Showing posts with label Cakes to Share. Show all posts

Friday, March 8, 2013

The Famous Mrs NgSK's Super Moist Butter Cake


Hi ! I always like to explore different Butter Cake recipes,
I've tried both whole eggs and egg separation method...
I still think that by using the egg separation method, it yields a moister & softer cake!


I decided to try this really famous Mrs NgSK's recipe.
I think many bakers were raving about this sometime ago.. 


It really lives up to its name!
Really cottony and moist in there,
Super fragrant too! I used SCS butter!

tried my best to decorate the cake, it looks kind of odd..  =p 
please pardon me


Somehow the cake was more fragrant on the next day!
Maybe it's the same theory as Kek Lapis and mooncakes?


A heavenly slice!
Better than any butter cake sold in stores. 
Highly recommended recipe!


----------------------------------------------------


Mrs NgSK's Super Moist Butter Cake


230g Salted Butter, Softened (Cool at 18-20C, not glossy)
200g Eggs, No shell (4 Medium Eggs)
 50g + 150g Sugar
200g Self Raising Flour, Sifted.
 60ml Milk
  1 Vanilla Bean, Seeds Scraped (or 1 tsp vanilla extract)


1. Preheat oven at 150C. Prepare a 8 inch square pan. Line the base and grease the sides 
(greasing helps the cake’s sides to rise well)
2. Separate the eggs, and place the whites into a medium sized bowl.
Beat egg whites until soft peaks, gradually add 50gm sugar and beat until stiff. Set aside.
3. Cream butter and 150gm sugar until pale and fluffy. 
Put in vanilla paste and and beat for a while. 
Put in egg yolks one by one and beat well after each addition.
4. Put in half the flour and mix on low speed until incorporated.
 Put in milk in 2 additions and mix until well incorporated. 
Mix in balance of flour.
5. Put half the egg whites in and mix on low speed.
 Pour the balance of egg whites in and FOLD. 
6. Pour batter into pan and level.
7. Bake for 50 - 60 minutes or until skewer comes out clean.
(After baking, I left the cake in the tin to cool hoping that it will be moister.) 


--------------------------------------------


Recipe Source from : Lynara Cakes

Tuesday, July 5, 2011

Old Fashioned Butter Cake

I'm now really into these old fashioned cakes after baking the banana cake last week!
I think next up will be butter walnut cake!
I've baked some butter cake before this, 
and I can say that this is the best so far! =)
the other recipes uses whole eggs to beat, but this is using the egg separation method.
It yields a softer and fluffier cake!
I must say that I'm really poor in taking cake pictures...
I can't seem to find the "important" focus! haha..
so please pardon me...
Plus, I really don't like the poor lighting in my house...


I hope you can see the texture of this cake...
I suspect that my mixer is too fast..even when it's on lowest speed.
so there are many bigger air bubbles in my cakes...
I don't know what to do now =(

But still..this cake was well received, even by my 1year+ niece.
She ate a bit and asked for more and more!

I just had a tiny slice and I will refrain myself from eating more..hehe..
but..it's really a slice of goodness!!

It's so fragrant that when my man opened the cake tray cover,
the smell actually flowed to me...
so I knew that he's "stealing" some butter cake to eat! HAHA!


 ------------------------------------------------------------

 Old Fashioned Butter Cake


250g Butter (I used SCS Salted Butter)
100g Sugar
5 Large Egg Yolks (I used 6 medium)
230g Cake Flour
1 tsp Double Action Baking Powder
4 Tbsp Milk (I used evaporated milk)
1/2 tsp Vanilla Essence

5 Large Egg Whites (I used 6 medium)
90g Sugar


1. Place the butter, sugar and vanilla in a bowl. Use an electric mixer to beat until light and creamy.
2. Add the egg yolks, one at a time, beating well after each addition. Add the flour and baking powder and beat well to combine. Fold the milk in and combine well.
3. Beat egg whites in a clean large bowl until it becomes soft foam. Gradually add in sugar, and beat till soft peak.
4. Take one portion of the egg white mixture, and use a hand whisk/spatula to stir well with egg yolk mixture till combined into a thick paste.
5. Slowly fold in the balance egg white with a spatula till well mixed.
6. Pour batter into a 8inches cake pan lined with baking paper and grease lightly.
7. Bake at preheated oven at 180c for 55mins or until cooked, it's done when the skewer comes out clean.

------------------------------------------------------

Recipe Source from : Nasi Lemak Lover (Sonia)

Saturday, July 2, 2011

Banana Cake (The Power of Home Baked Cakes!)


Finally..I can totally feel the power of home baked traditional cakes!
This cake really gave me a nostalgic feeling...
brought back some childhood memories while I was eating a slice..
This was the look of the cake b4 baking....


& after baking...
Earthquake! HAHA!
The slices of bananas made the cake looked quite "nasty"...
But wait....Do not judge a cake by it's cover!!
the taste was..ermm..Bombastic!!


I couldn't wait for the cake to cool down completely, 
got myself a slice and enjoyed it for tea while it was still warm...
I must admit that it's really extremely fragrant!


I feel so satisfied...
The taste was really rich! No banana essence used!
I cut down on butter and sugar..so it's not over oily or sweet, which I love!
My man said it's a bit dry for him, but still good! (Maybe the reduction in butter)
Actually for me...I feel that it's totally fine! Everything is just right!
I guess different people have different taste and opinions...
let me know your feedback after baking this cake! =)


----------------------------------------------------------

Banana Cake

180g Butter (I used 140g Unsalted Butter)
180g Fine sugar (I used 70g White Sugar & 30g Brown Sugar)
2 Extra Large Eggs - Lightly Beaten
250g Cake flour
1 tsp Baking Powder
1 tsp Bicarbonate of Soda
220g Bananas - mashed (I used 250g)
50g Dairy whip cream (I used evaporated milk)
1/2 tsp Banana essence (I replaced with 1 tsp vanila essence)
2 bananas - Sliced

1. Cream butter and sugar till light and creamy.
2. Pour in eggs gradually and beat till creamy.
3. Add in whip cream (evaporated milk), mashed bananas and banana essence(vanilla essence). Mix well.
4. Add in cake flour, baking powder and bicarbonate of soda and beat for a while only.
Do not over mix!
5. Pour into an 8" round tray, and arrange sliced bananas on top.
6.  Bake at 175C for about 50 to 60 mins. or until skewer comes out clean.
(I let the cake cool in pan)

-------------------------------------------------------------

Recipe Source from : Yochana's Cake Delight

Tuesday, June 14, 2011

"Berryful" Layered Cake

I had some leftover Pour & Whip after making the durian layered cake..
don't wanna waste it, so decided to make another layered cake with US Strawberries given by my sister 
and my own blueberries.
I think it looks pretty plain...
So, added some chocolate rice to make it look more exciting~
Nicer? Hehe..
I actually thought for a long time for the decoration...
I've never tried decorating a whole 8 inch cake with fruits before.
I had only a few pieces of strawberries, 
so decorations and fillings are quite limited...
I think my creaming skill is better for this cake~
I made this on Saturday from 10.30 to 1am!!
Luckily the cake turned out well!


First slice is for my man...without fail =)
this was taken on a sunday morning..
so it was his breakfast!
a pretty good breakfast right...?


A closer look..see the top layer which is slanted? hehe..
My cake was like a mountain before slicing..
and i didn't wanna level it, as i know the sliced away part will go to waste.
& looking at this picture, I have this "christmas" feeling! HAHA!


This is my first time cutting a cake into 3 layers and second time using this chocolate sponge cake recipe..
Still as good!! It's bouncy!! So springy that when you press on it, it will surely bounce right onto the floor..!
Oops..sorry..I mean it will bounce back to the original shape..
It's a hot favourite recipe for bloggers, do try it!


---------------------------------------------------------------

"Berryful" Layered Cake


203g Whole Eggs (4 eggs for mine)
32g Egg Yolks (1 egg yolk for mine)
135g Sugar
21g Glucose (I omitted it)
1g Salt
32g Oil
21g Cocoa Powder
106g Cake/Top Flour
1g Baking Soda
21g Milk


Preheat oven @ 180 degrees upper heat, 160 degrees lower heat.

1. Heat up the oil and add in cocoa powder. Whisk till well mixed. Set aside and let cool.

2. Beat eggs, sugar and salt on high speed. (Beat immediately after adding sugar and salt)

3. Add glucose when sugar and salt are well mixed with eggs. Beat further with medium speed.

4. Sift flour and baking soda into the batter and mix in low speed for 20 seconds or fold in with spatula.

5. Scoop a small portion of batter into the cocoa+oil mixture and combine well. Mix this back to the egg batter.

6. Lastly, add milk into the final batter and pour into the pan till 60-70% full.

7. Bake for 35 minutes. When it's cooked, overturn it on cooling rack.

8. Let it cool completely before unmoulding.

----------------------------------------------------------

Sunday, June 12, 2011

Durain Layered Cake


My Daddy & Mummy were talking about durian cake a few days ago,
they often patron this home baker.
I told them to buy some durian and I will make for them!
I actually woke up at 6.30am to bake again! HAHA!
I hope I will not do it again, because at such an early hour, I was still quite blur and got the measurement of the sugar wrong + beat the egg too fast!
So..the cake was not as moist & fine compared to my previous try.
Kind of regret..


Now look at some happy stuffs~
A slice for my man...
As you can see from the pictures, it was a gloomy day...


I love to see the innards of cakes!
It's just like unwrapping some presents,
not knowing how it looks like until you cut it open!


Special gift for my family...


This is how theirs look like..I really need to brush up on my creaming skills!
It may not be a pretty cake, 
but it's filled with my hard work and effort!


This is for my man...he loves it! Ate quite a lot! 
For the cream, I used Pour & Whip. It's good!! better than the other brand that I've used previously..
As for the Sponge cake, I used THIS RECIPE (Click to view)
I used 2 boxes for durian for these 2 cakes,
 removed flesh from the seed then puree 1/4 of the durian
 followed by mixing the puree with a portion of whipped cream, 
, the rest of the durian flesh were placed on this cream for the inner layer of the cake.

Monday, May 30, 2011

Pandan Chiffon Cake

I cooked my man's favourite green bean soup with banana and drizzled with coconut milk on Saturday.
So there's lots of coconut milk left...I decided to make pandan chiffon cake on Sunday!
This is my 2nd time using this recipe,
I did not have a proper chiffon cake pan back then...


& normally, I will not have a browned chiffon cake,
they always turned out to be whitish in colour instead.
I asked my aunt, who is a fabulous baker why is this happening.
So she gave me a tip..
to place the pan right at the bottom of the oven,
do not put any trays in the oven.
So i followed her advice...

~and here's my Pandan Chiffon Cake~
I can see Brownnnnnn....
but I'm quite bad at unmoulding, so the crumbs kind of fell off at some parts.
I'm happy that it's nicely shaped, because I didn't add any cream of tartar..
I will normally omit it as I consider it as a "chemical.
I want good health for everyone!


This is a natural green cake...
no artificial flavouring or colour..
it's made by 100% Pandan Juice..!


 Although there's some holes in the cake,
It's still soft and moist..plus, this cake gave me a sizzling sound which chiffon bakers want!
There's a hint of coconut milk and pandan flavour in every bite..
My family ate and said it's very good!
I'm so glad  =)

(signing off with me munching on a slice of pandan cake..sense of satisfaction!)


-------------------------------------------------------------

Pandan Chiffon Cake


(A)
4 Egg Yolks
30g Fine Sugar
1/4 tsp Salt
40g Corn Oil 
140g Coconut Milk + Pandan Juice
*Take 130g~140g of coconut milk and blend 8~10 pieces of pandan leaves 
and sieve to get the above


(B)
120g Cake flour
1/2 tbsp Baking powder

*Sift 2x

(C)
5 Egg Whites
50g Castor Sugar
1/2 tsp Cream of Tartar (I omitted this)


1) In a bowl, using hand whisk, whisk yolks and sugar till sugar dissolves.

2) Add oil and salt, whisk and add coconut milk and pandan juice. Stir well.

3) Fold in sifted flour and mix well.

4) In another bowl, using an electric mixer, beat till the whites are frothy. Add in sugar gradually and beat till soft peaks.

5) Add in Cream of Tartar and beat till stiff peaks.

6) Fold in 1/3 of the whites into the yolk mixture using a rubber spatula till incorporated.

7) Pour the mixture to the remaining egg whites and fold in gently till incorporated.

8) Pour the batter into a 21cm chiffon tube pan. Bang the pan on the table to get rid of bubbles.

9) Oil a piece of aluminium foil and cover the pan loosely. Bake at 170 deg.C for 10mins. (I did not cover with aluminium foil.)

10) Turn down the temperature to 160 deg.C and bake for 20mins.

11) Reduce the temperature to 150 deg.C and bake for 10mins. Insert a skewer to check if the cake is done. Remove the foil and bake for another 5 to 10mins to brown the surface.

12) Remove from the oven and invert the pan. Run a sharp knife along the edges to remove the cake from pan when it's completely cooled.

 ---------------------------------------------------------

 Recipe Source from : All that matters

Thursday, May 26, 2011

Spiced Carrot Cake (Almost 40% Wholemeal)


I actually woke up at 6.30am to bake this cake, because I need to leave home at 10.30am...
shredding carrots in an early morning is quite a weird experience for me..
my man said I'm crazy to wake up so early and just to bake a cake!?!?!


By 7.30am, the aroma of cinnamon filled my kitchen...
what a wonderful morning!
Another really simple yet flavourful cake...
Just require dry and wet ingredients, then mix and bake! =)


I substituted all purpose flour with wholemeal flour again..
but the cake was still soft and spongy!


This cake is extremely good!
It's very soft for a cake which doesn't require beating of eggs...
My Grandma and Aunt came over to my place, I served them one slice each.
They said it's very yummy...My Aunt asked for a 2nd serving!
She's actually a baker and really good in it!
So..I think this cake must have some standard which made her praise it..

Plus when I'm typing this post, my man was eating this and kept saying really good really good!


So here's another recipe for you to try out! 
I've altered some ingredients and amounts, 
so If you would like to use the original recipe,
scroll to the end of this post and click on the link! =)

Happy Baking!!! =D


--------------------------------------------------------------

Spiced Carrot Cake

60ml Vegetable Oil
80g All Purpose Flour
30g Wholemeal Flour
1 tsp Baking Soda
1/2 tsp Ground Cardamom or cinnamon (I used cinnamon)
1/4 tsp salt
2 Large Eggs
100g Granulated Sugar
60g Light Brown Sugar
160g Low Fat Yogurt
1 Cup finely Shredded Carrot (2 medium)


1. Preheat oven to 180 degrees.Brush an 8-inch round cake pan with oil. Place a round of parchment paper in the bottom; brush with oil, and dust with flour, tapping out excess. Set aside.

2. In a medium bowl, whisk flour, baking soda, cardamom or cinnamon, and salt; set aside. In a small bowl, whisk eggs, sugars, yogurt, and oil until smooth. Gently mix egg mixture into dry ingredients until moistened; mix in carrots. Transfer batter to prepared pan.

3.Bake until a toothpick inserted in center comes out clean, 40 to 45 minutes (if browning too quickly, tent cake with aluminum foil). Cool in pan for15 minutes. Turn out of pan, remove paper, and cool completely on a rack, right side up.

-----------------------------------------------------------
Recipe source from : Martha Steward's Recipe

Tuesday, May 17, 2011

Mini Chocolate Gateau

Today is another holiday for me, and for many others too...
tomorrow will be back to normal again..
time flies and 3/4 of the day is gone~
Supposed to go to my in law's house but in the end it was canceled..
so I spent my day cooking and baking plus sitting in front of my lappie, chatting and surfing.
that's my usual routine =)
How did you spend your holiday?


The other day, I specially bought some 72% cacao dark chocolate to bake some chocolaty stuffs!
I wanna submit my chocolaty bake to DG from Tested & Tasted
for May 2011's Aspiring Bakers #7 - Chocolate Delight again...


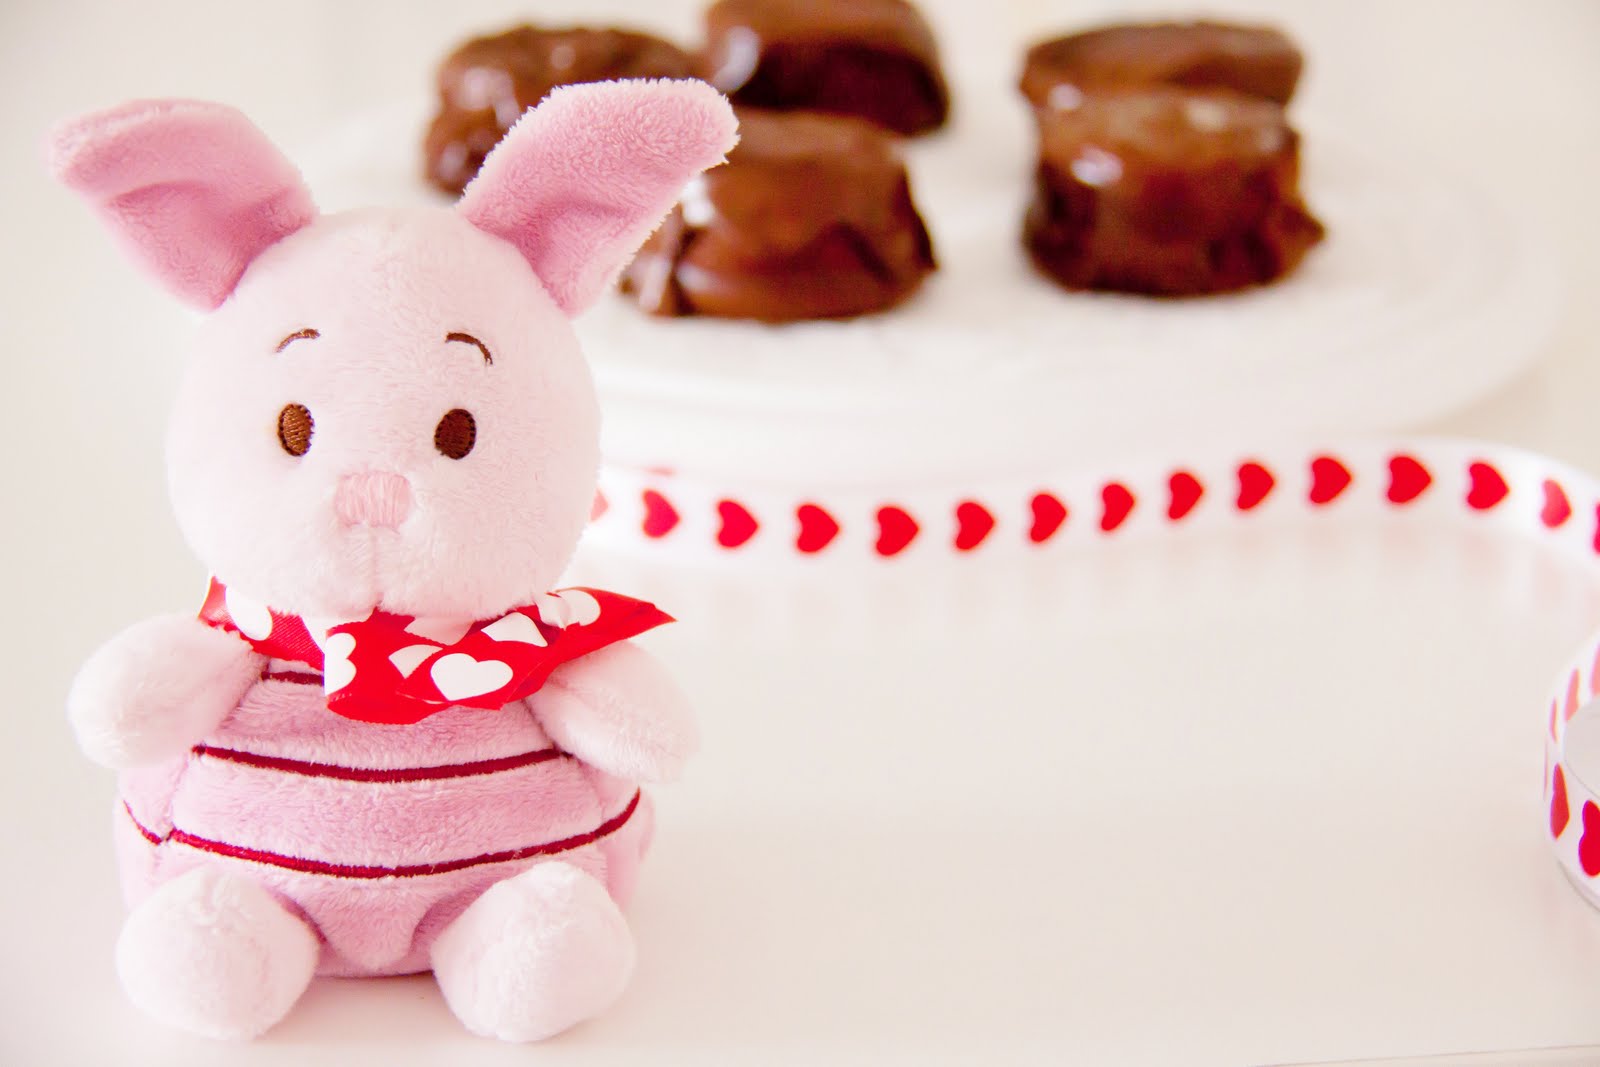
This is a permanent resident in my home =)
Piglet with a "sorry" look...
it was a little gift from my man a couple of years ago.
Today, I wore a scarf for Piglet...


She's always sitting on my oven's handle...
and whenever my niece is here, she will play with Piglet...
but not for long! HAHA!


Enough said....
here comes the chocolate gateau...
I halved the recipe and made into muffin sized cakes.
This will half the calories too! 


I'm bad at making it look pretty...
but the appearance of the chocolate gateau did not affect the taste!
I felt absolutely satisfied after eating one chilled gateau...
so generously covered with ganache..
It's so rich and the sweetness is just right!
What more can I ask for on such a relaxing afternoon? Hehe..


Quick! Buy some chocolates today! =)


-----------------------------------------------------------------

Chocolate Gateau

150g Dark Chocolate, broken up
75g Golden Caster Sugar (I used white sugar)
150g Unsalted Butter, diced
1 Tbsp Honey
4 Large Eggs, Separated
200g Grounded Almonds
75ml Milk (I used low fat fresh milk)

Chocolate Ganache:
100g Dark Chocolate, chopped
120g Heavy Cream (I used canned Nestle brand)
1 Tbsp Unsalted Butter (Own addition)
1 1/2 Tbsp Brandy (Own addition)

1. Line the base of a 20cm cake pan (with removable base) with parchment paper, grease the sides with butter and set aside.

2. Separate egg yolks from whites when the eggs are still cold. Set aside to bring to room temperature.

3. Place chocolate, sugar, butter, honey in a bowl set over a pan of simmering water. Stir frequently till the ingredients melted. Let cool.

4. Transfer to a large bowl. With a manual whisk beat in egg yolks and ground almonds, then stir in the milk. (Just a few stir should get everything incorporated. The mixture will be rather thick at this stage.)

5. In a clean, dry, grease free mixing bowl, with an electric mixer, whisk egg whites until stiff. With a spatula, Fold In the beaten egg whites in 3 separate additions, into the cake mixture. (Ensure all the whites are fully incorporate into the cake mixture after every addition.)

6. Pour batter into prepared cake pan (the final batter will be less thick). Give the pan several sharp taps on a work top to bring up any air bubbles that may be trapped in the batter.

7. Bake in a pre-heated oven at 170 degC for 35-40mins, until a skewer inserted into the centre comes out clean.

8. Remove from oven, let cool in the pan for about 1omins. Run a thin-bladed knife along the sides of the pan, unmold and cool right-side up.

9. To make chocolate ganache: bring the heavy cream to a boil, remove from heat and add in chopped chocolate and butter. Stir till chocolate is melted and mix brandy in. Let cool for a few mins and spread over the cake. (You can add some milk if the ganache is too thick.)

 ----------------------------------------------------------

Recipe Source from : Happy Home Baking

Saturday, April 16, 2011

Lemon Chiffon Cake


Another healthier choice....
Lemon Chiffon Cake!
 Who doesn't want a slice of fluffy and soft cake?
I'm a fan of baking chiffon cakes, 
because they are not that sweet and not as sinful too, so its better for my family too =p
Actually I don't really like sweet stuffs,
I will just take a bite/slice for my bakes and that's all.


A closer look at the texture...
Actually the cake slipped out of the chiffon pan when I inverted it,
I guess it was under baked. 
Despite this, it still tasted pretty good and moist too..


My man's breakfast for consecutively 2 days~
8/10 slices of the cake was wiped out by him...!
My all time loyal supporter...   =)


---------------------------------------------------------------

Lemon Chiffon Cake


90g cake flour
5 egg yolks
20g caster sugar
60g canola oil
50g water
1 tbsp lemon juice (I used 1 1/2 Tbsp)
1 lemon's zest


5 egg whites
90g caster sugar
10g corn flour


1. Preheat oven to 160°C. Sift flour twice.
2. Place egg yolks and sugar in a bowl and beat well. Add water, canola oil, lemon juice and zest and stir to incorporate. Add flour and mix well until the batter becomes sticky.
3. To make meringue, combine sugar and corn flour. Beat egg whites until foamy. Add half the sugar and continue beating for a few minutes, then add remaining sugar and beat until egg whites are glossy and stiff peaks form.
4. Add one-third of meringue into egg yolk mixture and fold in lightly, then add remaining meringue and fold to incorporate completely.
5. Pour batter into an ungreased chiffon cake tube pan. Bake for 40 mins.
6. When cake is done, remove from oven and turn it over, leaving it to cool.
7. Once cake has cooled completely, carefully run a knife or spatula around the sides of the cake to loosen it before inverting onto a wire rack.

--------------------------------------------------------------

Recipe Source from : Noms I Must

Monday, April 11, 2011

Orange Chiffon Cake

I've been wanting to bake so much..
looked around for recipes which are healthier.

Here's my choice for today's bake..
Orange Chiffon Cake!


A slice prepared for my man so he can taste it once he's home..
He said it was moist and soft/fluffy, 
only that it's not sweet enough, because I used Demura Sugar instead of caster sugar.


This is one of my favourite fork =)


 I hope you will be able to see the fluffy texture of the cake.
The sky was gloomy for the entire day and it started to rain when I started to click on my shutter button...
Therefore, I was not satisfied with my photographs..
I hope that my next bake will be on a sunny day! =)

--------------------------------------------------------------
Orange Chiffon Cake

 5 Egg Yolks + 30g Castor Sugar + Salt 1/4 tsp
60ml Corn Oil
85ml Orange Juice
1/2 tsp Vanilla Essence
115g Cake Flour
3/4 tsp Baking Powder
Finely Grated Zest from 1 1/2 Large Orange

5 Egg Whites + 50g Caster Sugar + 1/2 tsp Cream of Tartar


1. Sieve flour and baking powder.
2. Use hand whisk to beat egg yolk until creamy and light in colour.
Add in corn oil, orange juice and vanilla essence. Mix after each addition.
3. Add in flour mixture into yolk mixture lightly. 
Add in orange zest. Mix again.
4. Beat egg white with electric beater until big bubbles are formed. 
Sprinkle in cream of tartar and beat until it is white in colour.
Add in 50g sugar in 3 additions (a little at a time) and beat till stiff peak.
5. Pour 1/2 egg white mixture into flour mixture in (3) and blend well.
6. Pour flour mixture into the rest of the egg white and blend well.
7. Bake at 175 degrees for 45 minutes.
8. Invert cooked cake for cooling and unmould when it has completely cooled down.

-------------------------------------------------------------

Recipe Source from : Do What I Like

Monday, February 14, 2011

Flourless Chocolate Molten Cake (Perfect for Valentine's Day!)


Today is Valentine's Day and I believe that most couples will be celebrating by having a nice dinner.
Happy Valentine's Day to all my readers!!
For us, 
We did not have any special arrangement or celebration.
He took half day's leave and we stayed home.
I baked The Chocolate Molten Cake for him...
 A rare bake as I normally will not choose such sweet recipes.
Just because that it's Valentine's Day!
We need something which is romantic and sweeeeeet~~~~


don't they look elegant?


Look at the chocolaty lava in the middle of the cake..
I felt delighted to see that!
It's the most important character in this cake.


The thick chocolate~~filled with sweetness...


Another way of eating this cake is to let it set for a longer time,
and it will be brownie like.
It has more of a cake like texture in the middle. Spongy and soft.
Which one do you prefer?
I've put some in the refrigerator,
and after one day, it was sooo fudgy and rich!
It became dense and moist after setting for such a long time.
this recipe is worth for a try!

These Chocolate Molten Cakes are simple to make and good for serving your guests.
I bet they will be impressed!

---------------------------------------------------------

Flourless Chocolate Molten Cake

113g Unsalted Butter
170g Bittersweet Chocolate (I used Cadbury Old Gold 70% Cocoa)
3 Eggs
65g Sugar (Reduce to 40g)
1 tsp Vanilla Extract
A Pinch of Salt
1 Tbsp Sugar

Preheat oven to 200 degrees.
1. Generously butter 5 ramekins and dust the insides with granulated sugar.
2. Double boil chocolate and butter until melted. Set aside to cool.
3. Separate yolks from whites.
4. Beat yolks with 65g (40g) sugar and beat till pale, thick and fluffy. 
When you lift the whisk up, the batter will fall back into the bowl in slow ribbons. 
Beat in vanilla extract and fold in the chocolate mixture.
5. In another clean bowl, beat egg white until frothy and add in salt.
Continue to whip till soft peak and gradually add in 1 Tbsp of sugar. Whip till stiff peak. 
6. Gently fold in beaten egg whites to chocolate batter until just incorporated. 
Do not over mix as it will deflate the batter.
7. Spoon into individual ramekins until 3/4 full and bake for 10 - 15 minutes 
or until the edges are are set but a bit wet in the middle.
8. Remove from oven and let it set for 1 minute. And serve hot. 

---------------------------------------------------------

Recipe Source from : Joy of Baking

Friday, February 4, 2011

The Easy to Bake Kek Lapis


My 3rd time using this Kek Lapis recipe...
I think it's a pretty easy to follow.
When I made it for the first time, I was very new to baking.
And I succeeded...
 I doubled the recipe and it was really hard to manage..
butter splattered all over my kitchen! HAHA!
And my oven was not working very well for the grill function, 
it took about 10 minutes to bake each  layer..


And look at one of the dark layer. 
I turned the temperature higher, and my oven burst out in smoke! HAHA!
And it got charred!
I wanted to discard the whole thing, lucky i didn't because it still taste good~
Although the layers were uneven too =p
I'm glad that they love my kek lapis!

Hope all of you had a wonderful gathering with your love ones!

-------------------------------------------------------------------
Kek Lapis

330g Butter
250g Icing Sugar
15 Egg Yolks 
1/2 tsp Vanilla Essence
1/2 tsp Rempah Lapis
4 Tbsp Condensed Milk
1/2 Tbsp Brandy
105g Self Raising Flour
8 Egg Whites

1. Cream butter and icing sugar till pale in colour and beat in egg yolk one at a time.
2. Add vanilla essence, rempah lapis, condensed milk and brandy. Beat.
3. Add self raising flour tablespoon by tablespoon, mix well after each addition.
4. Beat egg white till soft peak in another bowl and fold into butter mixture.
5. Preheat oven in grill function at 180degrees. Use a 8" Square pan 
and scoop 4-5 Tablespoons of batter into pan 
and bake for 2 minutes or until browned.
6. Remove cake and press cake evenly. (For an easier way, you can use a kitchen towel)
7. Repeat steps baking steps until the pan is filled up.
8. Cool for awhile when finished. 
While cake is warm, place kitchen towel on top to allow excess butter to flow to kitchen towel.

---------------------------------------------------------------------

Recipe Soure From : I copied the recipe down years ago,
and don't know where it came from
Please let me know if it's your recipe.

Sunday, December 12, 2010

Rich Chocolate Torte (Yeah! It cracked!)


It's time to have some chocolate-ty cakes for our teatime!
The Rich Chocolate Torte!
An Amazing recipe which only requires a very little amount of flour, 
which results in a cracked & sunken cake..

Actually, If I'm not wrong,
normally flour is not used in torte recipes.
They use grounded nuts...
I think it should be more fragrant...


I'm currently in love with ribbons.
Any ribbons which are affordable in price, I will grab it!
And I think this ribbon with heart shaped printings contrast very well with this chocolate torte!


After cutting the cake up, I took a bite.
Oh My Goodness....
It's super moist! And not really sweet...
Not as sinful as I thought it would be!
My whole dining area was really messy due to the cracked portions.


But it's all worthwhile =)
Here's a slice for you...


Rich Chocolate Torte


170g Good Quality Dark Chocolate, at least 70% cocao 
(I used 72%)

75g Unsalted Butter

4 Eggs

100g Caster Sugar

30g Cake Flour


1. Preheat oven @ 180 degrees. Grease a 9 inches springform pan. ( I used 8inches)
2. Break chocolate and put in heatproof bowl with butter. Double boil it over almost boiling water.
Stir occasionally until it melts. Leave to cool.
3. Meanwhile, put eggs and sugar in a bowl and beat till it triples in volume.
When you lift the beater, it should leave a deep trail on the surface.
4. Add chocolate mixture to whisked egg mixture and fold.
5. Gradually sift flour over the top of the mixture and fold till just combined. Do not over mix.
6. Turn mixture into pan and spread to its edges and level it.
7. Bake for 20 minutes until the top of cake feels firm, or when skewer comes out with a few moist chocolate bits. Leave to cool in tin before unmoulding.


Recipe source from : All Recipes (UK)