Monday, January 31, 2011

Hokkaido 3.6 Milk Pudding


My house has quite a number of decorative ornaments..
They are mainly animal themed...
I love the country style feel...so soothing and makes me feel really comfortable...
I'm always happy when people come into my house and mention the word "cozy"...
That's what I want my guest to feel...and seriously, 
whenever I'm at home I don't even feel like stepping out!


Let me introduce one of my favourite ornament =)
It's hung in my kitchen!
Besides being an ornament, it has 3 hooks at the bottom and I can hang my keys.


The mooooooooooo...
so cute!

I love animals a lot, and in the beginning, I wanted my kitchen to be "meat free".
Means no eating or cooking of any meat in this house.
After moving in, I tried to stop my family from bringing meat in. 
And I don't buy any too. 

After awhile, I find that it's hard. 
I have guests around sometimes, and it's hard to cook without meat sometimes.
So I broke my own rule.
There's Chicken, Pork, Fish and Seafood in my freezer now!
As for mutton and beef..BIG NO NO...
I've not touched them for nearly 3 years I think...
I will start to cut down on meat intake after Chinese New Year again!

And in this post, there's no meat, just milk =)
The Hokkaido 3.6 Milk!
Hokkaido's 3.6 is a kind of premium milk.
I bought 2 cartons from Meidi-ya supermarket.
It costs $6+ each. 
I feel that it's worth the money.
After drinking, you will know why! =)
I don't know how to describe it, it's just different!!

After getting the milk, 
an idea popped out in my mind...
Why not make some pudding with it. Since it's thick!
And I have many boxes of Kanten in my cupboard..
I think it can last me for a few years!
Previously, I used it for diet purposes..I may start using it again!
Anyway Kanten is a 0 calorie kind of seaweed extract agar agar powder.
I will make some nice desserts with Kanten soon!

Here's my Hokkaido 3.6 Milk Pudding!
Look at the milk carton...
you may be interested to get it!


The recipe is very simple to follow...
I made it up myself, and I only used 3 ingredients.
don't wanna mix in too many ingredients because I wanna keep it close to original.


One of my favourite spoon...Loves...
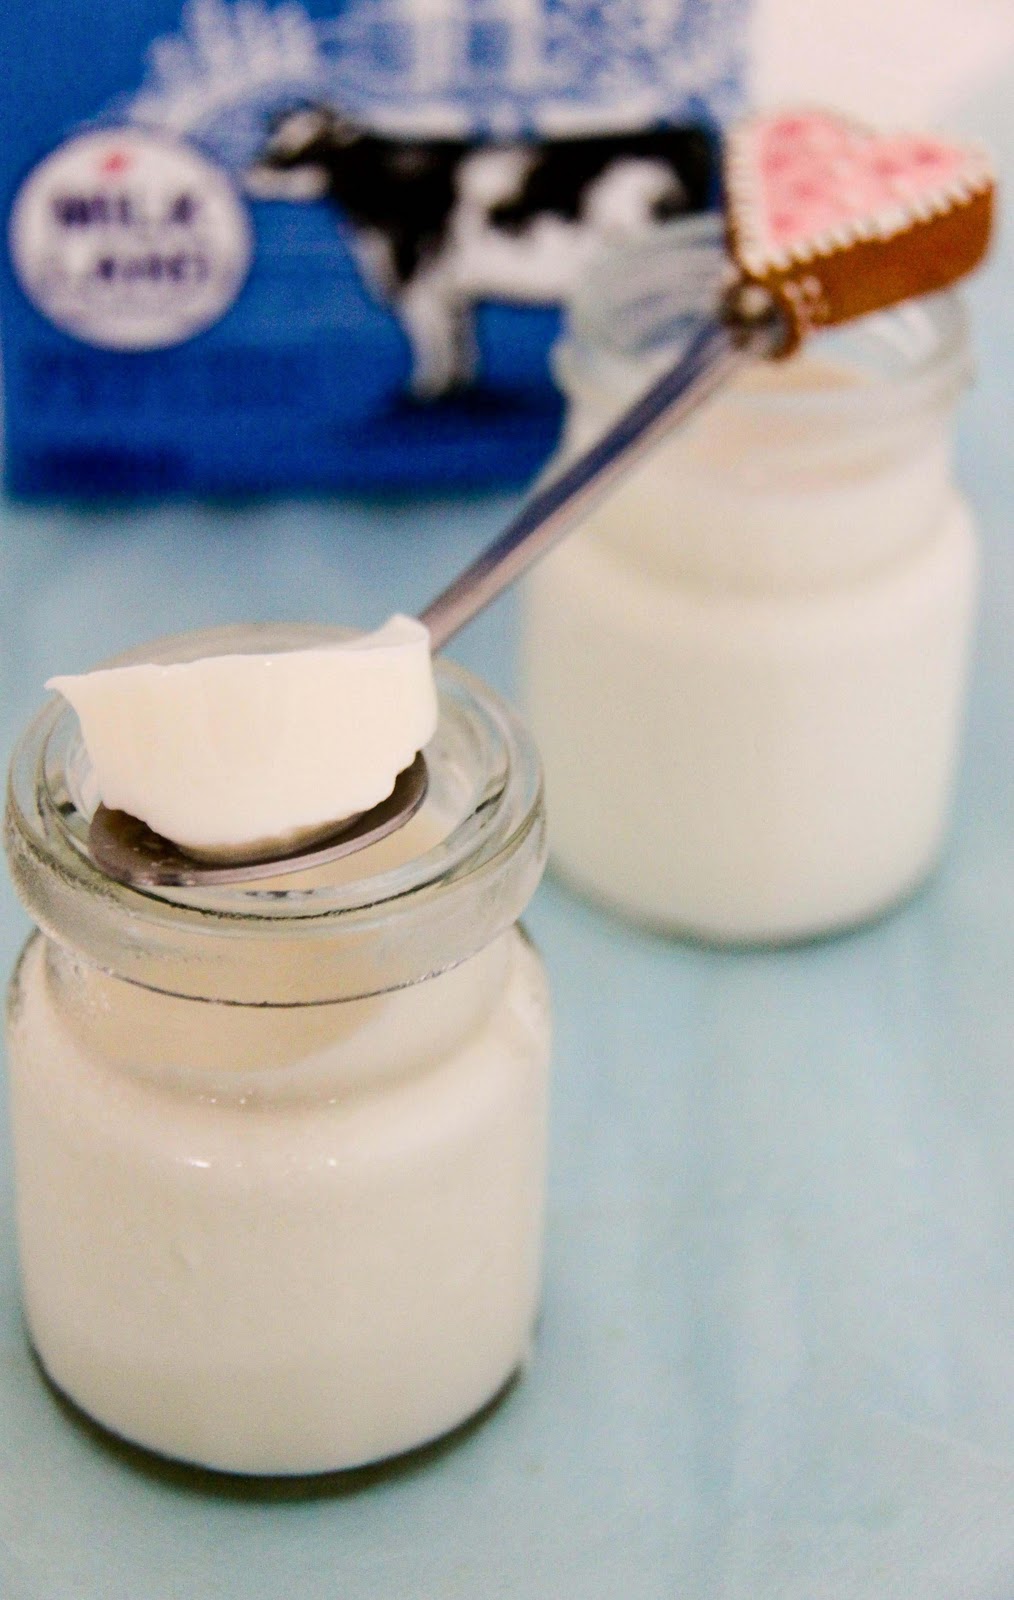

The soft and silky pudding...
Try it!!

Hokkaido 3.6 Milk Pudding

300g Hokkaido 3.6 Milk
3 Tbsp Sugar

1.  Heat milk & sugar over low heat in a saucepan/pot.
2. When there's small bubble at the sides, sprinkle Kanten into the hot milk.
3. Stir well and let it heat further for 2-3minutes.
4. Remove from heat and sieve milk into individual cups.
5. Let it cool to room temperature.
6. Transfer to the fridge, for at least 1 hour. Serve cold.


Sunday, January 30, 2011

Little Salty Almond Cookies

Hey there! 3 more days to go before the new year!
I believe that most of you are having festive mood now by indulging in good food!
Because I'm one of them! =p


I baked another batch of cookies~
The Salty Almond Cookies!


Small...cute...and very easy to make!
It's meant to be salty with a hint of sweetness...
Mine was a bit melt in the mouth kind.
I doubled the recipe, and it yields about 30 little cookies.


So i stored them in my own container,
and kept for our own consumption.. =)
Not giving this away...because it's not enough!
I'm gonna make some kek lapis soon!
It's been a long time since I've baked one...
I miss it!


Little Salty Almond Cookies

50g Butter
10g Icing Sugar
50g All Purpose Flour
10g Corn Flour
25g Almond Meal
1g Salt
Few Drops of Vanilla Extract

1. Place all ingredients in the bowl of a food processor and process until dough forms.
2. Wrap dough in plastic. Chill for 20 minutes for binding of dough.
3. Preheat oven to 180 degrees. Line baking tray with baking paper. 
Roll every 1/2 teaspoonful of dough on the baking paper 
and flatten them slightly using the back of the spoon. 
Sprinkle chopped almonds on each cookie.
(I rolled them into balls and dipped into the chopped almonds)
4. Brush with milk and bake for 5-8 minutes or until the edges are slightly brown.
5. Cool for 10 minutes on baking tray, and cool completely on a wire rack.


Recipe Source from: Bake for Happy Kids

Friday, January 28, 2011

Mini Golden Honey Cornflakes Cuppies


This is a must for our Chinese New Year cookie!
Although it's not traditional,
it's well received by everyone!
From oldies to kids =)

So I will make this every year..without fail!
Although it's quite time consuming to scoop the cornflakes into the small cuppies..
it's really worthwhile when you see everybody enjoying it~

Crispy...fragrant...!
There's lots of variations out in the market, but I still prefer the plain ones.
Original!

I've altered the recipe as the ones that I've baked before were too oily.
And the cuppies will be soaked with oil! 
If you wanna make this,
remember to use your favourite honey!
It plays a very important role, and affects the taste very much!

I will bake another batch this weekend!
It's never enough...   =p


Mini Golden Honey Cornflakes Cuppies

60g Butter
30g Sugar
160g Cornflakes
1 1/2 Tbsp Honey

1. Melt butter and sugar over low heat.
2. Add cornflakes to the melted butter and sugar. Mix well.
3. Drizzle in honey and mix again. Be extra careful as not to crush the cornflakes.
4. Arrange cornflakes into small cuppies.
5. Bake them in a 180 degrees preheated oven for 15 minutes or until golden brown.
6. Let them cool on wire rack completely and store in airtight container.

Tuesday, January 18, 2011

Egg in a Basket


This egg in a basket was really popular among food bloggers quite sometime ago.
When I was staying with my parents, I didn't succeed a single time in baking it.
Either the egg white leaked out of the bread, or the egg was not cooked right.
Maybe I should blame it on the oven  =p

The egg should be runny like half boiled egg.

And this time i made it for my breakfast~ finally succeeded!
It's a rare breakfast for me, 
as my breakfasts are always light.
Just a fruit, or a slice of wholemeal bread. 
Since it's the last day of my "HOLIDAY",
I decided to make it. For myself...


All ready to eat!
With fork, knife and spoon =)


So..the little teaspoon is for me to scoop the runny egg!

It should be an enjoyable meal..
but somehow... eating this alone is really no fun...
I think it's true that we need to eat with love ones to enjoy~~!
But hey, while I was digging in...
My Piano was looking at me so innocently! =)
She wants some too!
Isn't she cute????

Sunday, January 16, 2011

RED Egg White!!!


This title tells all !!

I freaked out after beating this egg!
I went Eeeeeeeeeewwwwww all the way~~~~~~
Is it safe for consumption!?!?

Any1 had the same experience as me?
I was about to beat it into my soup, 
and saw blood red stuffs, so I quickly stopped!
a few drops actually went into my soup....
it was cooked and became blood clots. 
I scooped the clots up and drank the soup as usual.
Although I find it quite yucky~I didn't wanna waste food.. =)

Saturday, January 15, 2011

Helloooooooo!!!

Hi!! All my readers.....!!!

sorry for being missing for such a long time!
My life was in a mess...ups and downs..a really jerky roller coaster ride!

I will be back really soooon!!! =)
Wait for me!

Monday, December 27, 2010

The Healthy Whole Grain - Organic Hulled Millet

Millet is mildly sweet and has a slight nutty flavour.
It can be cooked in many ways and added into many dishes.
Like salads and soups. 
Millet flour can be used to make bread, muffins, pitas..and the list goes on...
the most important thing is that millet adds fiber to your meals.

I replaced rice with millet, hoping that my dinner will be healthier.
it's my first try, and feel quite weird eating bird's food! HEHE!


A closer look at millet.
It looks like rice, but a lot smaller in grain size.
I steamed chicken, broccoli, cauliflower and carrot to go with it.
Sprinkled black pepper, and that's my dinner..


It's soft and fluffy,
But guess I need sometime to adjust to this taste.

Now, I would like to share how did I cook the millet.
Use 1 cup of millet : 3 cups of water
Boil for about 20 minutes when water has dried up.
Alternatively, it can be cooked in thermal cooker for 1 hour, or until water drys up.
Fluff the grains with a fork and serve.

Saturday, December 25, 2010

Baked Garlic Chicken with Fluffy Potatoes + Warm Seasons Greetings! =)


The rainy christmas is coming to an end....
Time flies and lets wait for the next holiday! =)
My family came over for a little impromptu gathering..

I made Garlic Drumsticks with Potatoes..as it's easy..
The potatoes were popular~
gone within a short time.


As for chicken drumsticks,
each of us had 1, 
and my younger sis ate 2! =)
Glad that it was all in their tummy now...


The Lasagna by my brother~
can you believe that this Lasagna's ingredients cost nearly 50dollars in total!
The ingredients are
  • Lasagna noodles
  • Spinach
  • Ricotta Cheese
  • Mozzarella Cheese
  • Oregano
No meat in there...


After cutting it up while it's still hot,
the cheese flow out ~
Woooooo~~


Our dessert from Canele..
This cake is super mini...Serves less than 6...
but costs about 40+ dollars...
Hmm...do you think that it's expensive?

Anyway, we had a fun chatting session too~
our house was filled with unlimited laughter...
I love it...
Another gathering soon.... =)

Hope everyone of you enjoyed your little or big Xmas gathering!
Happy Happy Xmas to all my readers! ~love~


Baked Garlic Chicken with Fluffy Potatoes

Chicken
8 Chicken Drumsticks
2 Bulbs + 4 Cloves of Garlic, Chopped
2 Tbsp of Ground Black Pepper or more
1 tsp Salt

1. Wash drumsticks, and pat dry with kitchen towel.
2. Mix chopped garlic, black pepper and salt together and marinate the chicken.
3. Store in ziplock bag and store in the fridge. Marinate for at least 6 hours or overnight.

Potatoes
8 Yukon/Russet Potatoes
2 Pinches of Salt
1 tsp Ground Black Pepper
Some Olive Oil

1. Cut each potato into quarters.
2. Put potatoes into a pot and add water until it covers all potatoes, 
bring to a boil and boil for another 12 minutes.
3.. Drain water with sieve and put it on top of the hot pot for 1 minute.
4. Pour the hot potatoes back to the hot pot.
5. Sprinkle a pinch of salt and black pepper followed by olive oil and mix well.


To bake:  
 1. Preheat oven to 200 degrees.
2. Lay potatoes evenly on pan and put chicken drumsticks skin side up on top.
3. Drizzle with more olive oil on the chicken.
4. Bake for 30 minutes or until slight brown, and turn drumstick to skin side down. 
5. Bake for another 10 minutes.
6. Turn the drumsticks again, now skin side up. 
7. Bake for another 10 minutes or until golden brown.
8. Serve hot.

Friday, December 24, 2010

To-Die-For Blueberry Muffins


Sorry for the lack of post...
I'm back! =)

With these muffins!
 It looks like a mushroom,
I did not grease my muffin pan, so the muffins got stuck in the pan.
Had a hard time getting them out, some broke.


 It has a crumbly top which is very crispy after baking.
Actually the fragrance started to flow around while it was baked halfway.


This muffin is moist too! 
So its the combination of soft + crispy.
Best eaten warm.
The crumbly top will be even more fragrant and crispier!
HAHA..The name, To die for blueberry muffins seems too serious...
Try it out to find out whether it's really to die for???


To-Die-For Blueberry Muffins

Muffin Mixture
190g All Purpose Flour
150g Caster Sugar
1/2 tsp Salt
2 tsp Baking Powder
80ml Vegetable Oil
1 Egg
80ml Milk
145g Blueberries or more

Crumb Toppings
100g Brown Sugar
40g All Purpose Flour
55g Butter, Cubed
1 1/2tsp Ground Cinnamon

1. Preheat oven to 200 degrees. Grease muffin cups or pan, with or without muffin liners.
2. Combine flour, sugar, salt, baking powder for muffin mixture in a large bowl.
3. Place vegetable oil into a 1 cup measuring cup. Add the egg and enough milk to fill the cup.
4. To make crumb topping, Mix together brown sugar, all purpose flour,  cubed butter, and 1 1/2 teaspoons cinnamon. Mix with fork until crumbly. Or you can use the rub in method.4. Mix wet muffin mixture with flour mixture. Fold in blueberries.  
5. Fill muffin cups right to the top, and sprinkle with crumb topping mixture. 
6. Bake for 20 to 25 minutes in the preheated oven, or until done.  

Recipe Source From: All Recipes

Friday, December 17, 2010

Cooking Porridge with Japanese Short Grain Rice


I used Japanese short grain rice to cook into porridge..
in a chinese style...
To my surprise..the porridge was very thick and gluey~!
Like those store bought ones which had been slow cooked over the fire for numerous hours.

An amazing result!

The 2 other ingredients are chicken thigh stripes and century egg.
A simple meal which is filling.

Try using short grain to cook porridge one of these days...
I know you will love it!

How to cook this? 
1 cup rice : 3 cups water

1. Rinse rice with water and drain, repeat 2 more times.
2. Drain rice and pour into pot, followed by adding water.
3. Soak for about 45 minutes.
4. Cook over high heat to a boil and turn to low heat. Simmer until porridge becomes thick.
Alternatively, you can bring it to boil and put in your thermal cooker for at least 2 hours.
& Enjoy!